
☎️Channels
In the «Channels» section you can add communication channels — accounts in messengers and social networks, and also manage them.
Section description
To go to the section, click in the control panel on «Channels».

The table displays a list of created channels:
Type — type of communication channel.
Login — login or account identifier.
Profile name — account name.
Used in — tasks in which this channel is involved.
Sent today / total — number of messages sent during the day and for the entire period.
Status — channel status:
awaits — account is awaiting;
active — account is active;
ban — account has been banned.
Control — in this column a button to delete the account.
Adding a channel
Go to the «Channels» section and click «Add channel».

The tab «Add channel» will open. In the dropdown list select the desired channel type, find the corresponding subtitle in the article below and connect the channel according to the instructions.

Vkontakte user
A VKontakte user account; the channel is connected using login and password.
Phone — enter the phone number to which the account is linked;
Password — enter the account password;
Use a Proxy — check the box if you need to use a proxy to log into the account instead of accessing it directly.
Click «Add channel».

If two-factor authentication is enabled, first disable it, then set a new login password and connect the channel correctly using the login and password.
How to set a password in a VK account
If the password is missing or was not created previously (for example, in a new account during registration), set it in the security settings.
To do this, in the top right corner of the profile click the menu and select «Account settings VK ID».

Go to the «Security» tab and select «2-step verification».

In the opened block choose the option «Code generating app» section and click «Confirm action».

In the next window, enter the SMS code to confirm.
Create a new password, repeat it and save it for yourself. This password will be required when connecting the channel in Selarti. Click «Continue».

After that a window for configuring the app will appear — click «Back to VK» to skip this step and return to the profile.

Done, the password has been created!
Telegram cloud
A Telegram user account for incoming and outgoing communication, it is recommended to connect Telegram Premium to it.
By default, AI usage in Telegram groups or channels is disabled. To enable it, please contact tech support: @selartitech_bot.
To use this communication channel, connecting a proxy is mandatory. More about purchasing and connecting proxies in the article.
Phone — enter the phone number to which the account is linked;
Click «Send code».

A code will be sent to the Telegram account, enter it in the displayed «Code» field and click «Add channel».
If two-factor authentication is enabled, then after performing the previous steps you will see a «wait_password» error in the lower right corner, and on the left, in the channel connection window, a password field will appear — enter your Telegram password and click «Add channel».

Do not authorize your personal accounts if you plan to use the service for outgoing messages.
WhatsApp WEB
A WhatsApp account connected via a web session. Primary session is in the active application on a mobile device.
Enter the phone number to which the account is linked in the «Phone» field, then click «Get code».

Enter the received code in your WhatsApp / WhatsApp Business app. To do this open the WhatsApp app and select in settings «Linked devices».

Then click «Link a device».

Next choose «Link white phone number instead».

In the next window, enter the received code.
Connecting WhatsApp Web works only if the AI manager is active, as session support requires resource activation: an additional service ensures stable operation, and Selarti servers regularly check session availability and automatically reconnect it during short outages. At the same time the web session is not permanent; sometimes WhatsApp requests re-authorization and you need to manually enter a new confirmation code.
For correct operation the connected WhatsApp account on the physical phone must be active: when logging out of the account, losing connection, or prolonged inactivity on the device — the web session ends.
Recommendations when connecting WhatsApp to Selarti
Use your own WhatsApp numbers, do not use purchased accounts, temporary numbers or SMS services to avoid blocks and loss of access to accounts.
Do not connect WhatsApp via emulators — this is unsafe and leads to unstable operation, connection drops and blocks.
Do not frequently change accounts on one device — WhatsApp marks this as suspicious activity, which may lead to blocking.
If the number was recently registered in WhatsApp — wait a few days before connecting it to the service and during that time gradually conduct correspondence with a small number of contacts.
For businesses with a large volume of correspondence it is better to consider connecting WhatsApp Business API.
WhatsApp business API
A detailed instruction on setting up the WhatsApp Business API channel is in this article.
Vkontakte bot
A VKontakte bot that communicates with other users through community messages.
Copy and paste the token of the community being connected into the «Token» field, then click «Add channel».
How to get a token for a Vkontakte bot
Go to the «Management» section in your VK community;
In the right side menu go to More > Work with API;
Click «Create key»;
Add permission to access messages;
Copy the token.

Works only on incoming dialogs.
Telegram bot
A Telegram bot for automating interaction with other users.
By default, AI usage in Telegram groups or channels is disabled. To enable it, please contact tech support: @selartitech_bot.
Copy and paste the token of the community being connected into the «Token» field, then click «Add channel».
How to get a token for a Telegram bot
You can get a token for an existing bot in a chat with BotFather using the command /token. If multiple bots are created, specify which bot the token is needed for.
Creating a new bot in Telegram
To create a new bot, choose the command /newbotin a chat with BotFather. Next specify the bot's name. Clients will see this name when communicating with you.
Next, specify the bot's username. The bot's username must be unique and end with bot, for example selarti_ai_bot.
The bot is created. To copy the token, click the line with the token.


Works only on incoming dialogs.
Telegram for business
A Telegram account feature within the Premium subscription that allows turning a regular messenger account into a business version with greater automation of processes.
By default, AI usage in Telegram groups or channels is disabled. To enable it, please contact tech support: @selartitech_bot.
Available only to Telegram Premium subscribers.
Main features and benefits of this channel:
You can configure access to certain chats and categories. In Selarti messages will only come from users with access, unlike Telegram Cloud, where the entire account is synchronized with Selarti;
Convenient bot management through the Telegram app interface — you can selectively start or pause the bot in dialogs.
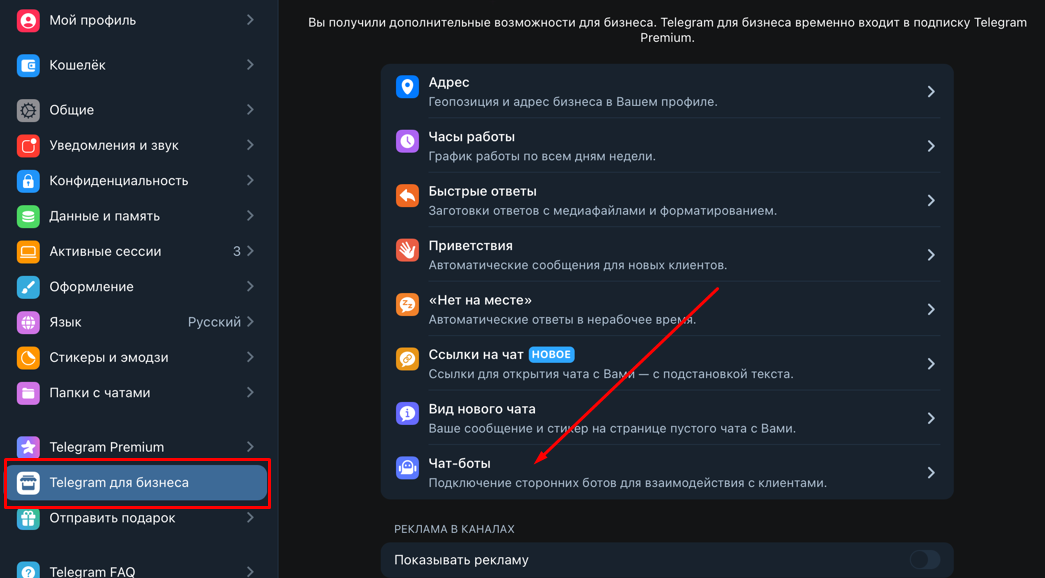
Open Telegram settings, select Telegram for business > Chat bots .
Connect @selarti_bot to the account, choose the chats available to the bot. Add exceptions if necessary.
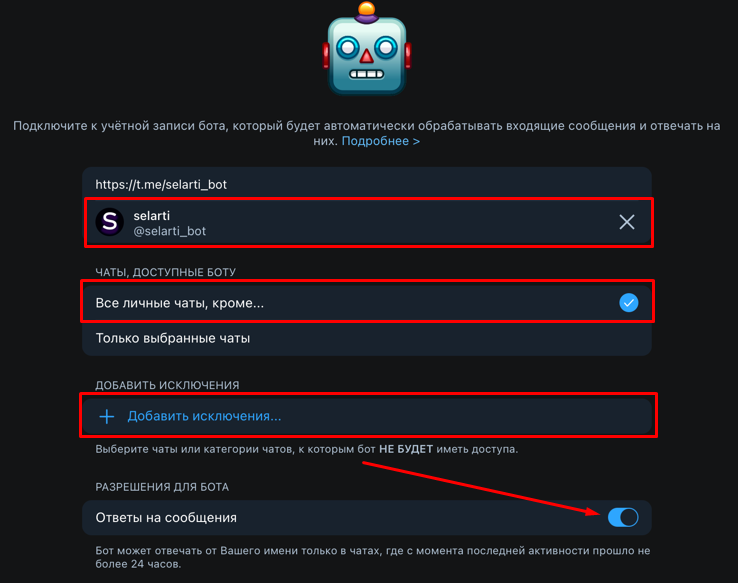
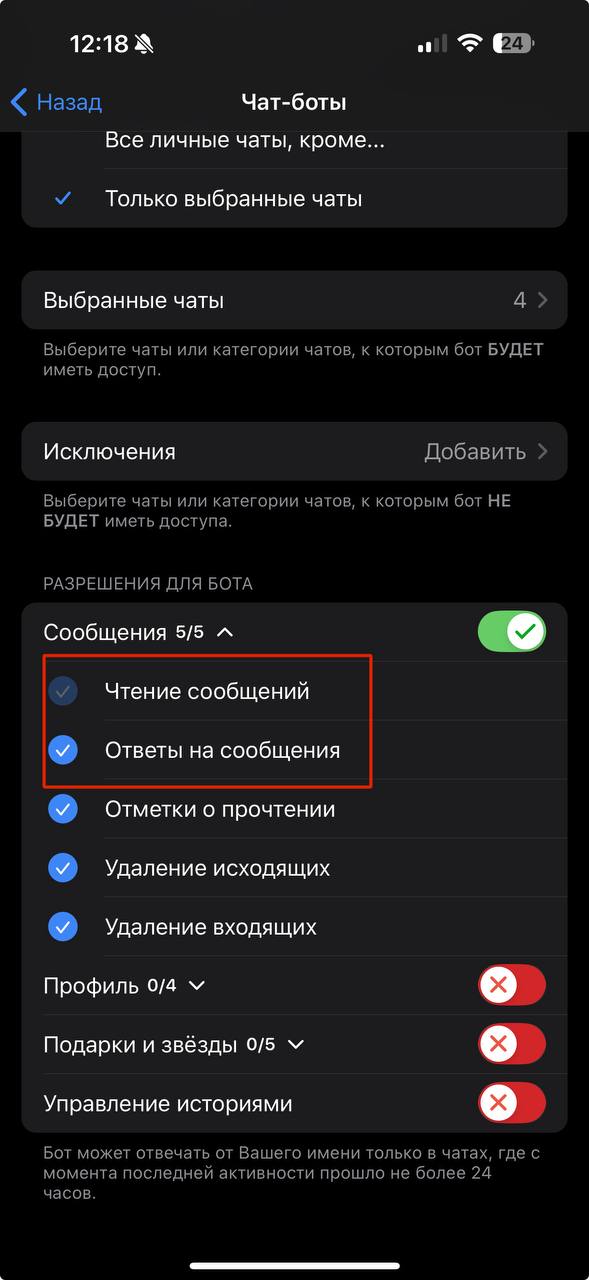
Make sure that in the «Permissions for the bot» subsection the items «Read messages» and «Reply to messages» are selected.
From the configurable Telegram account send the command /get_connection_id to the @selarti_bot and copy the obtained id.
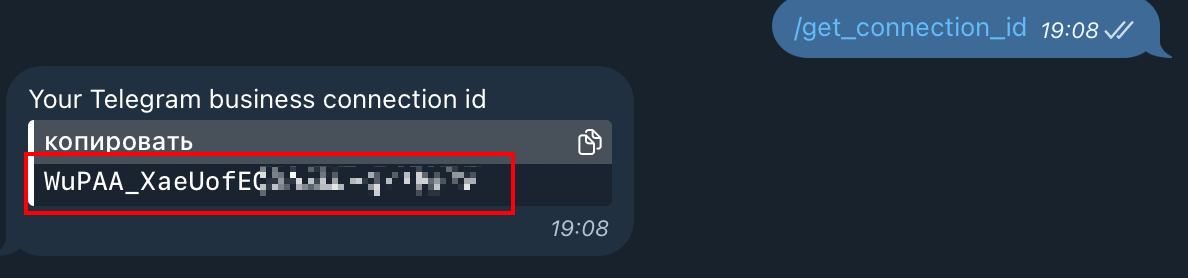
When adding a channel in the «Telegram connection id» field paste the obtained id and click «Add channel».

Next create a task according to the instruction with the type «Telegram» and the working format — «Incoming communication».
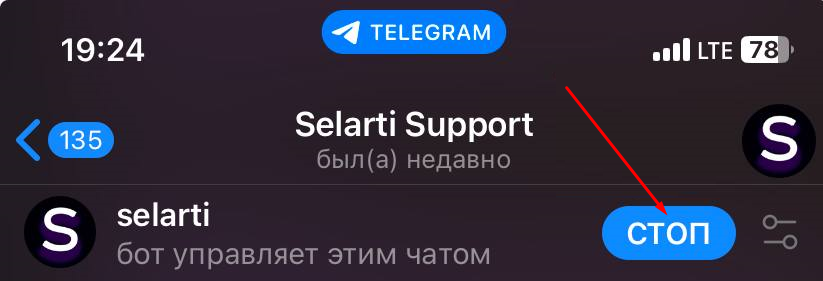
To stop or start the bot, open the Telegram app, find the desired chat and click the button «STOP» or «START» for the corresponding action.
Iframe | Page messenger
A detailed instruction on setting up the «Iframe» and «Page messenger» channels in a separate article.
Avito
A profile on the Avito online service.
You can only connect the channel using the «Professional» plan. Avito has disabled API access on the regular plans.
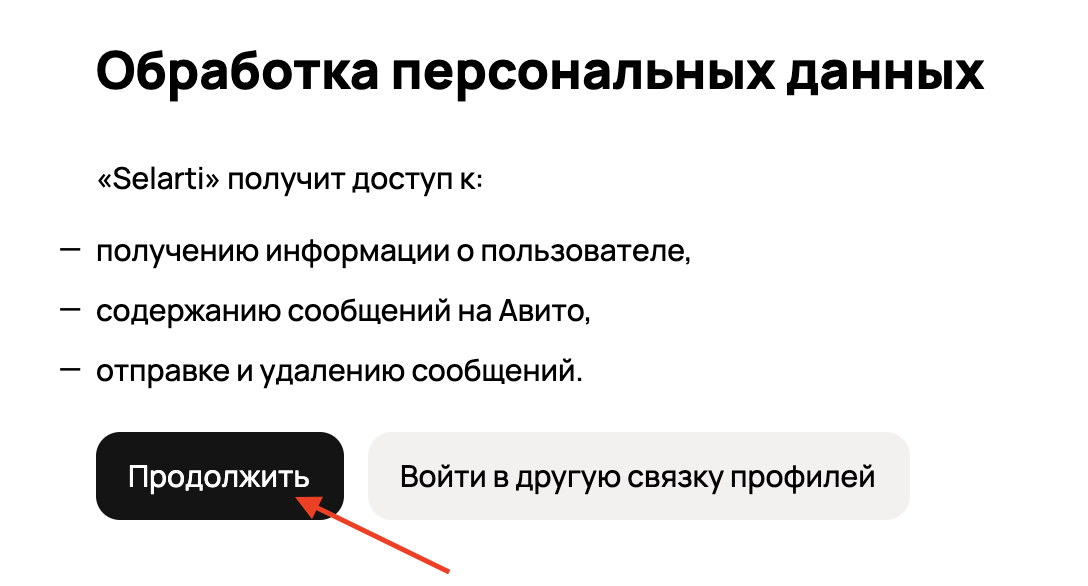
Click «Login avito».

In the opened window provide access to your Avito account using the button «Continue».
Connection is available only for the «Professional» profile on Avito.
amoCRM/Kommo
Click «Add channel».

Log in to the service, add funnels for the AI-manager to work. More about the setup in article.
Instagram*
A user account of the social network Instagram.
Click «Login Instagram».

Log in to the service, allow access to information.
* Instagram is a product of Meta, which is recognized as an extremist organization in Russia.
MAX user
MAX messenger user account for incoming and outgoing communication.
Connecting MAX user works only with an active AI manager.
Click «Get QR».

A QR code will appear on the screen. Next, in the MAX mobile app, go to «Профиль» and select «Устройства».

Tap «Войти по QR-коду».

Scan the code.
If two-factor authentication is enabled, a password field will appear. Enter your additional MAX password in this field and tap «Save».

If the channel is used for outgoing communication, then the format of the uploaded target audience should be like: 79008007060.
Last updated